2012年3月31日 星期六

Opennebula 3.3.0 in Ubuntu 11.10 安裝

看不習慣的話可以到google doc看 http://goo.gl/sLoq7

這邊的安裝步驟主要是參考
http://www.qyjohn.net/?p=1581製作出來的
  1. [管理端] 安裝基本作業系統,這邊是採用Ubuntu 11.10

安裝光碟可以到 http://ftp.twaren.net/ubuntu-cd/ 這邊下載


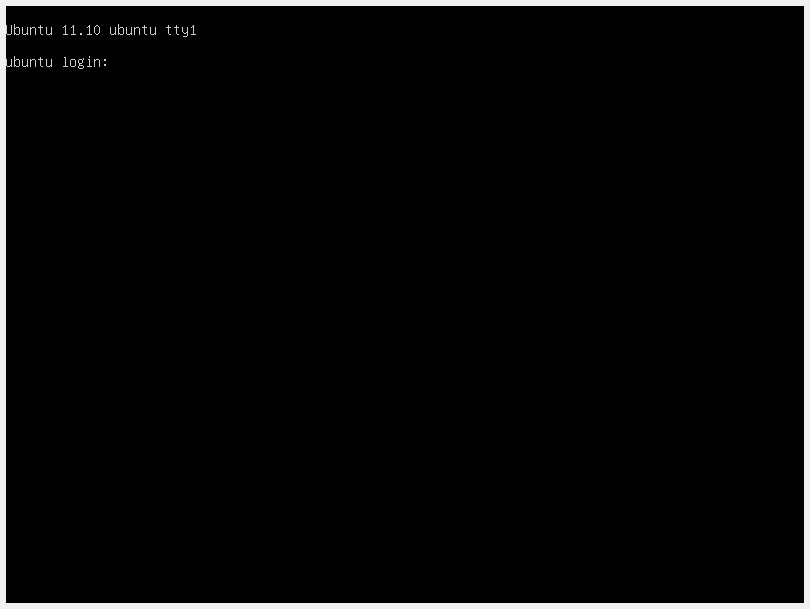
  1. 安裝完作業系統,重開機就會出現登入的畫面
  2. 先使用自己的帳號登入,準備開始安裝Opennebula的套件,這邊是採用tarball的方式安裝
  3. 開始創建Opennebula所需要的目錄以及使用者跟群組

sudo mkdir -p /srv/cloud/
sudo groupadd -g 10000 cloud
sudo useradd -u 10000 -g cloud -m oneadmin -d /srv/cloud/one -s /bin/bash
sudo passwd oneadmin
sudo chown -R oneadmin:cloud /srv/cloud/
su -l oneadmin
ssh-keygen
cat ~/.ssh/id_rsa.pub > ~/.ssh/authorized_keys
echo “StrictHostKeyChecking no” > ~/.ssh/config
exit


  1. 安裝NFS服務,以供之後migration所需 (如果只有單台可跳過)

sudo apt-get install nfs-kernel-server
sudo pico /etc/exports


  1. 編輯 /etc/exports

加入此行

/srv/cloud *(rw,fsid=0,nohide,sync,root_squash,no_subtree_check)


  1. 啟動NFS服務

sudo /etc/init.d/nfs-kernel-server start


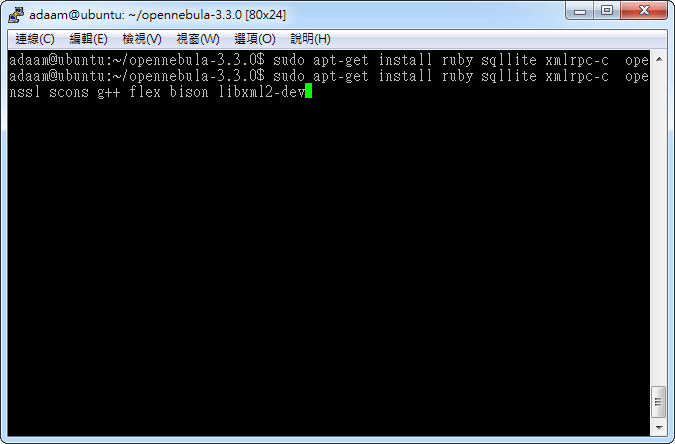
  1. 安裝Opennebula 需要使用到的套件

sudo apt-get install libsqlite3-dev libxmlrpc-c3-dev g++ ruby libopenssl-ruby libssl-dev ruby-dev
sudo apt-get install libxml2-dev libmysqlclient-dev libmysql++-dev libsqlite3-ruby libexpat1-dev
sudo apt-get install rake rubygems libxml-parser-ruby1.8 libxslt1-dev genisoimage scons
sudo apt-get install mysql-server
sudo gem install nokogiri
sudo gem install rake
sudo gem install xmlparser
  1. 建立MySQL資料庫,提供Opennebula使用

mysql -u root -p
CREATE USER ‘oneadmin’@'localhost’ IDENTIFIED BY ‘oneadmin’;
CREATE DATABASE opennebula;
GRANT ALL PRIVILEGES ON opennebula.* TO ‘oneadmin’ IDENTIFIED BY ‘oneadmin’;
quit;


  1. 以下更換成oneadmin使用者,下載並安裝opennebula

su -l oneadmin
wget http://dev.opennebula.org/attachments/download/478/opennebula-3.0.0.tar.gz
tar -zxvf opennebula-3.0.0.tar.gz
cd opennebula-3.0.0
scons sqlite=no mysql=yes
./install.sh -u oneadmin -g cloud -d /srv/cloud/one


  1. 編輯 ~/.bash_profile 新增變量,使之後的指令可以順利執行

export ONE_LOCATION=/srv/cloud/one
export ONE_AUTH=$ONE_LOCATION/.one/one_auth
export ONE_XMLRPC=http://localhost:2633/RPC2
export PATH=$ONE_LOCATION/bin:/usr/local/bin:/var/lib/gems/1.8/bin/:$PATH

source ~/.bash_profile


  1. 編輯 ~/.one/oneauth 設置之後要用的用戶名稱及密碼

mkdir ~/.one
echo “oneadmin:YOUR_PASSWORD” > ~/.one/one_auth
chmod 640 ~/.one/one_auth


  1. 編輯 ~/etc/oned.conf 更改使用MySQL資料庫

# DB = [ backend = "sqlite" ]


# Sample configuration for MySQL

DB = [ backend = "mysql",

server = "localhost",

port = 0,

user = "oneadmin",

passwd = "oneadmin",

db_name = "opennebula" ]


  1. 到這邊 Opennebula的管理節點就全部設定完畢,如果你只有一台(管理與計算節點一起),請繼續在這台執行以下的動作
  2. [計算端] 安裝計算節點的作業系統並登入
  3. 安裝虛擬化需使用的套件

sudo apt-get install qemu-kvm libvirt-bin bridge-utils ubuntu-vm-builder ruby


  1. 安裝NFS客戶端 (若只有一台可跳過)

sudo apt-get install nfs-common

  1. 編輯 /etc/fstab (在這邊我們假設剛剛的NFS伺服器在192.168.1.1)

192.168.1.1:/srv/cloud /srv/cloud nfs defaults 0 0


  1. 建立NFS目錄以及掛載遠端目錄

sudo mkdir -p /srv/cloud
sudo mount /srv/cloud


  1. 創建Opennebula要使用的使用者及群組 (單台可跳過此步驟)

sudo groupadd -g 10000 cloud
sudo useradd -u 10000 -g cloud -m oneadmin -s /bin/bash
sudo usermod -d /srv/cloud/one oneadmin
sudo passwd oneadmin
sudo chown oneadmin:cloud /srv/cloud/


  1. 編輯 /etc/libvirt/libvirtd.conf

unix_sock_group = “cloud”


  1. 編輯 /etc/libvirt/qemu.conf

vnc_listen = “0.0.0.0″


  1. 重新啟動libvirt

sudo service libvirt-bin restart
sudo chown :cloud /var/run/libvirt/libvirt-sock


  1. 編輯 /etc/network/interface,此處需視自己的網路狀況設定

auto eth1

iface eth1 inet manual


auto br1

iface br1 inet static

address 192.168.1.2

netmask 255.255.255.0

network 192.168.1.0

broadcast 192.168.1.255

bridge_ports eth1

bridge_stp off

bridge_fd 0

bridge_maxwait 0


  1. [管理端] 再來要把可以執行虛擬機器的節點添加進來,請注意,如果只有一台的話也要把自己添加進來
  2. 加入計算端

onehost create 192.168.1.2 im_kvm vmm_kvm tm_shared

onehost list

成功的話應該會看到機器已經加進來,狀態(STAT)需要是on


  1. 加入完之後,下載一個已經配置好的虛擬機器做測試

mkdir ~/one-templates
cd ~/one-templates
wget http://dev.opennebula.org/attachments/download/170/ttylinux.tar.gz
tar xzf ttylinux.tar.gz


  1. 編輯 ~/one-templates/small_network.txt

NAME = “Small Network”

TYPE = FIXED


BRIDGE = br1

LEASES = [ IP="192.168.1.5"]

LEASES = [ IP="192.168.1.6"]

LEASES = [ IP="192.168.1.7"]

LEASES = [ IP="192.168.1.8"]

LEASES = [ IP="192.168.1.9"]

LEASES = [ IP="192.168.1.10"]

LEASES = [ IP="192.168.1.11"]

LEASES = [ IP="192.168.1.12"]

LEASES = [ IP="192.168.1.13"]

LEASES = [ IP="192.168.1.14"]

LEASES = [ IP="192.168.1.15"]


  1. 加入網路定義到Opennebula

onevnet create small_network.net


  1. 編輯 ttylinux.one

NAME = ttylinux

CPU = 0.1

MEMORY = 64


DISK = [

source = "/srv/cloud/one/one-templates/ttylinux.img",

target = "hda",

readonly = "no" ]


NIC = [ NETWORK_ID = 0]


GRAPHICS = [ TYPE = "VNC"]


FEATURES=[ acpi="no" ]


  1. 開始創建虛擬機器

onevm create ttylinux.one


  1. 可以用這個指令看虛擬機

onevm list


  1. 詳細資料可以用這個指令看,0是上面list裡面你自己的虛擬機器ID

onevm show 0


  1. 用 onevm list 找到虛擬機的VNC port (本例為5900),即可以用vncviewer開啟虛擬機畫面


PS. 若遇到ruby的問題(invalid date format in specification: "2011-08-25 00:00:00.000000000Z"

),可以先試試看更新ruby

gem update --system (Ubunt不可用,需要使用apt-get update在執行以下指令)
gem install rubygems-update
update_rubygems
資料來源: http://stackoverflow.com/questions/7290575/invalid-date-format-specification-in-gemspec

2012年3月28日 星期三

Ubuntu using Tex

本來是參考這篇文章

後來發現 Ubuntu 套件庫已經有內建 texlive了
可以參考這篇

簡單來說,只要在Ubuntu環境下(我是用11.10)執行以下指令

$ sudo apt-get install texlive
$ sudo apt-get install texlive-full
等上面裝好之後應該就已經有了tex的環境,可以直接編譯文件了
如果想要 GUI 的編輯畫面可以多執行

$ sudo apt-get install gedit-latex-plugin
就會在附屬應用程式裡面多出一個 TeXworks 的程式,可以在裡面輸入tex文件編譯執行
懶得找的可以直些複製下面的執行
$ sudo apt-get install gedit-latex-plugin texlive-fonts-recommended latex-beamer texpower texlive-pictures texlive-latex-extra texpower-examples imagemagick
中文字型的部份找到很多,不過我測試的是從這邊

在Texlive安裝完之後可以去下載
ftp://cle.linux.org.tw/tex/cjk/fonts/nsungt1/nsungt1-1.4.2.tar.gz

解壓縮之後執行該目錄下的 ./install.sh 就會有中文字型可以用了
想知道怎麼寫的話,底下有個 test 的資料夾可以進去看範例


2011年11月11日 星期五

如何在 GIT 跟 CVS 之間協同合作

主要可以參考這個網站 http://dabase.com/e/09017/

最近由於計畫需要跟別人做整合,但是計畫又是由別人主導的,
但是別人在版本控制系統用的是 CVS,自己本身已經使用 Git 習慣了,
只好開始找怎麼讓 Git 可以轉換成 CVS 的方法

在這邊就不贅述怎麼在 CVS 跟 GIT check out了

要在兩邊做同步,目前我嘗試出來的方法需要兩個目錄,
一個是專門給自己的Git用,一個專門用來給CVS commit用,

在這邊就用 proj.git 跟 proj.cvs 代稱兩個方法的目錄
首先用 git cvsimport 指令將 CVS import進來 proj.git 目錄內
指令大概是 git cvsimport -d :pserver:user@cvs_server:/cvs_root proj
在這之前可以先將cvs login,避免要一直輸入密碼

之後準備 CVS 用的目錄,這邊就照cvs自己的方法把目錄update或是checkout下來
指令大概是 cvs -d :pserver:user@cvs_server:/cvs_root checkout proj

之後就可以開始用git 把東西加進去了,commit之後我們要用
git cherry origin master 這個指令拿出等等要用來跟CVS commit用的一串編碼
理論上應該直接用最後一個就可以了,這邊我現在還沒做太多測試

再來要跟CVS commit之前,要先設定GIT_DIR變數到我們要跟哪個git資料夾同步的.git目錄
以這邊我們就要設定 export GIT_DIR="/home/user/proj.git/.git"
之後切換過去 proj.cvs目錄執行 git cvsexportcommit -v -c -w /home/user/proj.cvs/ ffceaad60e690600b2f56fd43755fe7e77da38ed
最後面那串就是剛剛我們用git cherry origin master拿出來的編碼
成功之後就被sync到CVS上面去囉

2011年6月20日 星期一

電腦的開機流程(轉載)

轉載自 http://ithelp.ithome.com.tw/question/10068591

--
回答:jeremy168( iT邦初學者10級 )
時間:2011-06-07 16:08:11

電腦主機板要完成開機需要PCR步驟才能才能開機
p為power c為clock r為reset復位
下面是酷皮網網友寫的精簡版開機流程
1.當主機板接上ATX電源部分.電路就開始工作.立刻在ATX第9腳輸出+5V的待命電壓.俗稱+5VSB.
同時在第14腳輸出約2.8-5V電壓.我們俗稱+5VPS-0V開機控制電壓.
2.當按下POWER-ON開機鈕時.主機板觸發電路立刻工作.首先將ATX第14腳+5VPS-ON電壓拉低至0V.ATX電源分別輸出+3.3V +5V -5V +12V -12V 供機板使用.
3.大約延遲50-500MS ATX電源內部控制IC.一但偵測到+3.3V +5V -5V +12V -12V能平穩輸出.就在ATX 第8腳輸出一個月5V的電壓信號.為PG信號.PG信號是機上復位RESET信號的源頭信號.
如果ATX電源偵測到+3.3V +5V -5V +12V -12V有對地短路或是漏電情況.則ATX電源立刻啟動自我保護切斷所有供電.
4.電源調整IC在+12V -12V正常情況下.以及PG信號正常情況下.便開始工作.輸出2個高頻脈衝開關
信號去控制一組MOS電路.導通後為CPU提供核心供電VCORE.
5.同時電源IC會輸出另一個控制電壓去控制另一MOS電路.輸出一個+2.5V的電壓.該電壓一般是時鐘IC
的供電組之一.並送給CPU作為參考電壓Vtt 2.5V
6.時鐘IC在供電PG正常清況下.內部分頻電路開始工作.將14.318M總頻OSC.經過分頻放大後給機板
各系統所需電路.
7.南橋在供電時鐘PG正常下.經過多重邏輯轉換而得來PG信號.自己內部復位電路加工後.送給各所需
電路復位.
8.北橋在供電時鐘.復位正常.將南橋送來的復位加工後給CPU.
9.CPU在電壓.頻率.復位正常下.CPU開始工作.首先開始尋找BIOS內部開機自檢程序.沿著地址線
發出尋址指令CPU-北橋-南橋-BIOS
10.CPU尋址過程中.指令到達南橋.就會在PCI A34槽位上產生一個波形信號.俗稱楨信號 FRAME#
11.CPU尋址到達BIOS.就在BIOS第22腳產生一波形信號.俗稱片選 CS# .就算取下BIOS一樣可以測到CS#這個信號.
12.CPU找到BIOS後讀取BIOS內部開機程序.並沿數據線送回CPU執行.BIOS-南橋-北橋-CPU
13.整個自檢過程中.透過插在PCI槽上的診斷卡以16進制代碼顯示出來.一但自檢完畢.CPU就將自檢
報告由螢幕顯示.
14.接著BIOS自檢程序將控制權移交操作系統引導.主機板開機完成..

2011年5月17日 星期二

hadoop install in ubuntu

最近因為計畫的關係需要建立hadoop系統
就照著網路上的範本寫了一份自己的版本
希望能幫助到大家囉

位子放在這邊 http://goo.gl/XitzQ

有需要補充或是不完全的地方還請大家協助指正

2011年4月8日 星期五

[memo] syslog-ng match option

事情的起因是在我在 Gentoo 修改 syslog-ng.conf ,想把 sshd 的 分離出來,使用了match之後,重開服務卻出現

the match() filter without the use of the value() option is deprecated

拿去google之後找到這篇
https://lists.balabit.hu/pipermail/syslog-ng/2009-September/013372.html
in syslog-ng versions prior to 3.0, the complete message starting from the program name was stored internally as a single string, e.g. the $MSG macro was a simple variable reference, and the match() filter always matched against this string. In syslog-ng 3.0, this was changed (because of the new IETF protocol format), syslog-ng stores all bits found in the syslog message in separate fields, e.g. $PROGRAM, $PID and $MSG together make up the syslog message as you know it. Because of backwards compatibility, match() still mastches against the old "$PROGRAM[$PID]: $MSG" format (expressed in the new meanings of these macros), however since this is not a simple variable reference anymore, syslog-ng needs to construct this value for every match() invocation. The match() filter has been repurposed, and a new message() filter was also introduced. E.g. if you want to match against the message payload (without the program name and pid), you should use the message() filter.
The match() filter was extended to be able to match against any fields of a syslog message using this syntax: match("regexp" value("MESSAGE"));
This is equivalent to the message() filter. However now you can also match against custom fields that you can associate with the message using parsers, e.g. you are not limited to internal values, you can also add your own. -- Bazsi

可是看不懂Value要放啥,所以找到這篇
There's still some problems related to match() with the value() option present. For now it only works with the 'standard' syslog parts (host, program, msg) _and_ the dynamic values generated using the new parser framework. Generic macros (which do not fall into the previous categories) do not. This is basically a design error, but I think it is a bug and I intend to fix it.  The correct syntax is value("MESSAGE"), e.g. there's no dollar sign before the macro name. This is not fortunate as it differs from the normal template definition where the dollar sign indicates that a macro expansion needs to be done. The problem is that I originally didn't intend to support _any_ kind of macro expansion here. That's the design error, that I have to admit.  The solution is not that difficult, but as of now, the value() option for the match() filter is not very usable. Sorry for that.  
Here's a list of supported "values":
 "HOST", 
 "HOST_FROM", 
 "MESSAGE", 
 "PROGRAM", 
 "PID", 
 "MSGID", 
 "SOURCE",  
And any kind of values that you created with a parser. Hopefully I can come up with a solution that's compatible with the current 3.0.x behaviour and one that is more intuitive.  --  Bazsi

2011年1月11日 星期二

[memo] mkfs.ect4

有時後會用到superblock的備份資訊,放在這邊避免以後還要找很久

machine / # mkfs.ext4 /dev/tfm/database
mke2fs 1.41.12 (17-May-2010)
Filesystem label=
OS type: Linux
Block size=4096 (log=2)
Fragment size=4096 (log=2)
Stride=0 blocks, Stripe width=0 blocks
32768000 inodes, 131072000 blocks
6553600 blocks (5.00%) reserved for the super user
First data block=0
Maximum filesystem blocks=4294967296
4000 block groups
32768 blocks per group, 32768 fragments per group
8192 inodes per group
Superblock backups stored on blocks:
32768, 98304, 163840, 229376, 294912, 819200, 884736, 1605632, 2654208,
4096000, 7962624, 11239424, 20480000, 23887872, 71663616, 78675968,
102400000

Writing inode tables: done
Creating journal (32768 blocks): done
Writing superblocks and filesystem accounting information: done

This filesystem will be automatically checked every 39 mounts or
180 days, whichever comes first. Use tune2fs -c or -i to override.